How to Use
FEATURE DETAIL
How to UseScanning Range Finder
Connect an Ethernet type LiDAR to your PC
PC IP address setting
When connecting the LiDAR to PC, it is necessary to set the IP address on the PC side. The procedure for Windows 7 will be explained from the next section, but the operation is the same for other OS.
[Procedure 1] Control panel
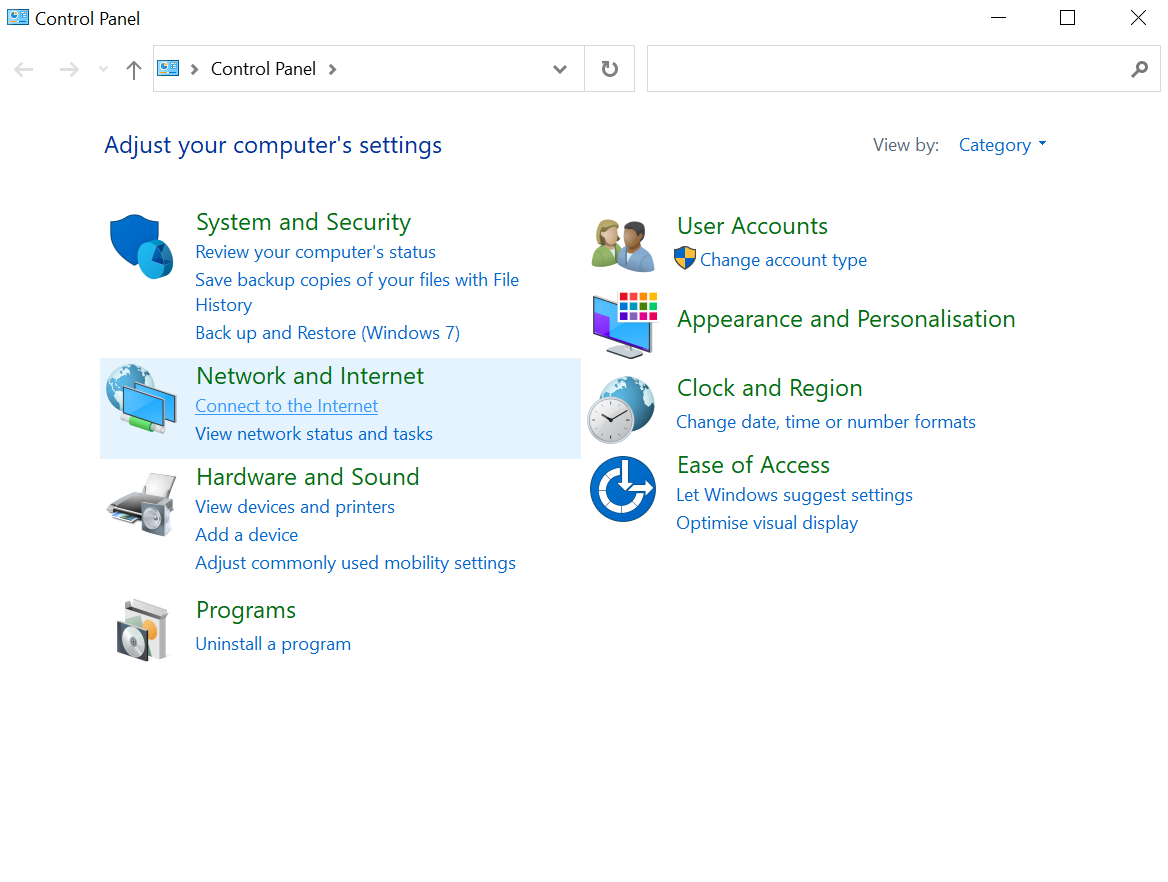
Open Control Panel and click View Network Status and Tasks.
[Procedure 2] Network and sharing center

On the Network Sharing Center screen, click the network adapter connected to the sensor.
[Procedure 3] Status of network adapter
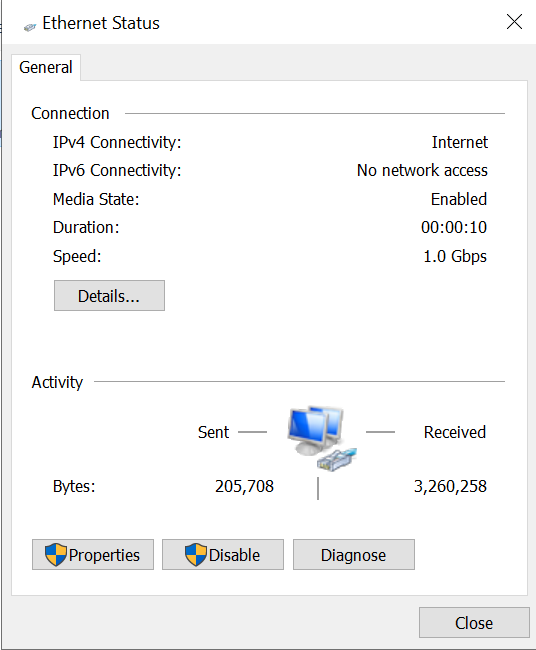
The status of the network adapter specified in [Procedure 2] will be displayed. Click "Properties".
[Procedure 4] Selection of Internet Protocol version 4 (TCP / IPv4)
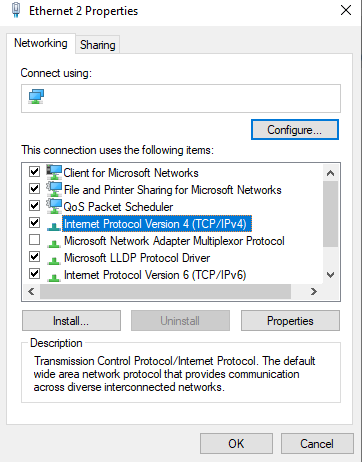
The setting screen shown above will be displayed. Click "Internet Protocol Version 4 (TCP / IPv4), and then click" Properties ".
[Procedure 5] IP address setting
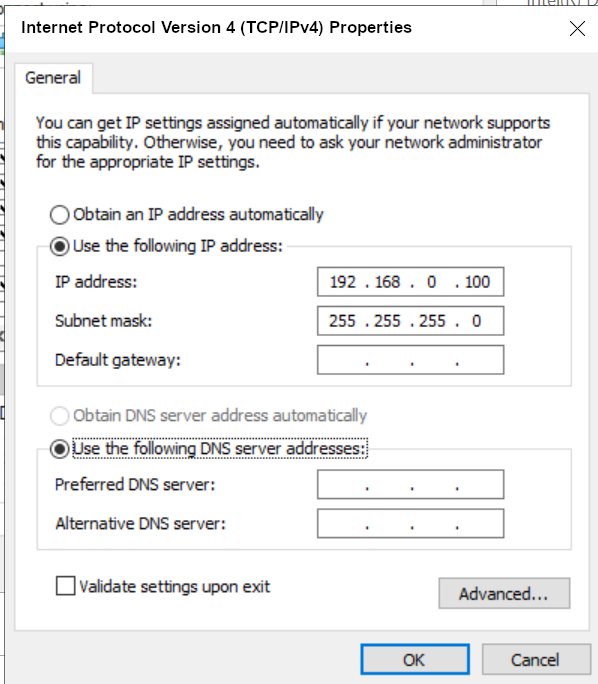
Enter the IP address. The IP address of the sensor is "192.168.0.10" by default, so make the 192.168.0 part the same and set the 10 part to a value other than 10 from 1 to 254. The subnet mask is automatically entered when you enter the IP address, but please set it to "255.255.255.0". No other items are required. After setting, click "OK" to complete the IP address setting.
Product's Category
- Scanning Rangefinder
- Photoelectric Switch
- Sensor for Iron & Steel Industry
- Optical Data Transmission Device